
Safe updates
The five-step safe driver update method for Windows 11 and Mac
Check, identify, get it from the maker, create a restore point, then install and verify. A calm method for changing one driver without guesswork.
What this section covers
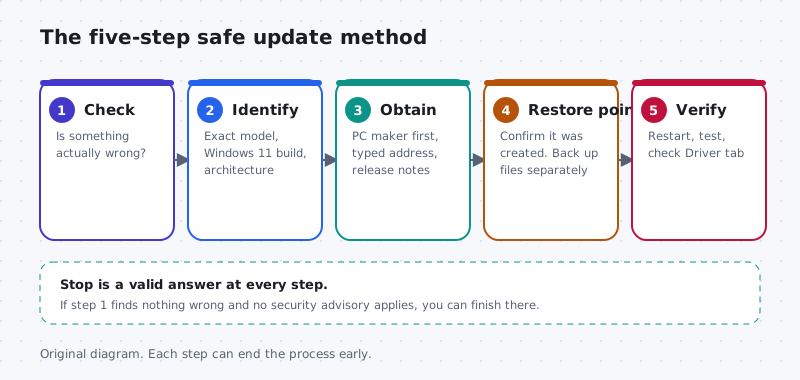
Most driver trouble does not come from old drivers. It comes from the wrong driver, from the wrong place, installed in a hurry. This guide gives you a five-step method you can use whenever you are thinking about changing a driver on a Windows 11 PC: check, identify, obtain from the manufacturer, create a restore point, then install and verify. Each step is short, and each one can end the process early if the answer is “no need”. The Mac works differently, so it gets its own note near the end.
This is the overview. For the exact clicks, the method links to our step-by-step setup guides rather than repeating them.
Step 1: Check whether a change is needed
Start with a reason. Good reasons are specific: a device that stopped working, a symptom named in a maker’s release notes, a security advisory that covers your hardware, or a Windows version you need that lists a newer driver. “There is a newer one” is not, on its own, a reason.
- Write down what is wrong, in one sentence, and when it started.
- Look for a warning mark on the device in Device Manager (right-click Start > Device Manager). Our Device Manager guide explains each icon.
- Open Settings > Windows Update and install pending updates first. Many driver and security fixes arrive this way.
Step 2: Identify exactly what you have
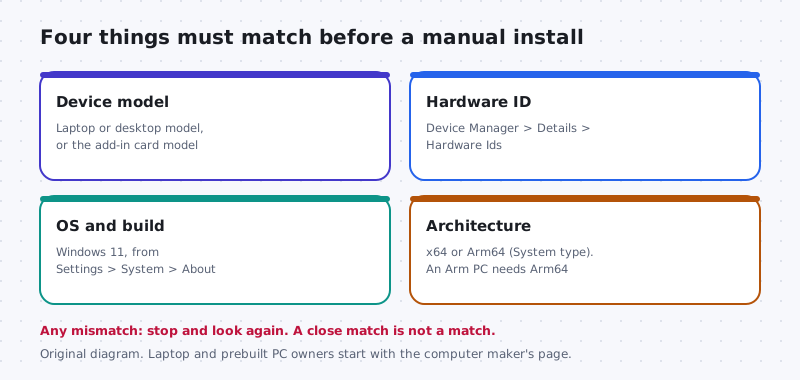
A driver is written for specific hardware. Before you install anything by hand, confirm four facts. Our guide to checking installed drivers shows where each one lives.
- Computer model: on a laptop or prebuilt desktop, the model and often the serial number are on a label underneath or in Settings > System > About.
- Device and hardware ID: in Device Manager, open the device’s Properties > Details, and choose Hardware Ids from the list. Note the current Driver Version and Driver Date on the Driver tab too.
- Windows version and architecture: Settings > System > About shows the Windows 11 edition and System type. An Arm-based PC needs Arm64 drivers; an x64 package will not do.
Step 3: Obtain it from the manufacturer
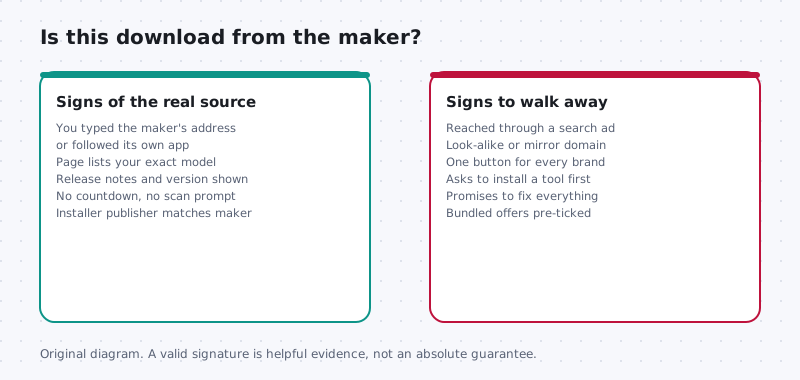
Go to the source that built or tuned the hardware. For laptops and prebuilt PCs, start with the computer maker’s page for your exact model. Their packages are tested with that machine’s board, power settings and special keys. Go to a chip or card maker only for parts you added yourself, such as a separate graphics card, and Windows Update remains a sound route for most devices. Our manual install guide and Windows Update driver guide walk through both.
- Type the maker’s web address yourself, or use the links at the end of this guide. Avoid search ads and pages that sell “driver packs”.
- Enter your model or serial number, pick Windows 11 and the right architecture, and read the release notes. Does the package fix your problem or name a security issue?
- Save the package, and note its version and date so you can compare with what you recorded in step 2.
Step 4: Create a restore point, and back up separately
A restore point lets Windows return system files, drivers and settings to an earlier state. Microsoft’s System Protection documentation explains that it is configured per drive, and on many PCs it is simply off.
- Select Start, type Create a restore point, and open the result. On the System Protection tab, check that protection is On for the system drive. If not, select it, choose Configure, then Turn on system protection.
- Select Create, give it a name like “Before audio driver”, and wait for the message that it was created successfully. No message, no install.
- Back up personal files separately, to an external drive or cloud storage you trust.
Step 5: Install and verify
- Install the one package, approve the administrator prompt, decline any extra software you did not ask for, and restart when asked.
- Open the device’s Driver tab and confirm the version matches what you installed.
- Test the thing that was broken, properly, for a while.
If the device behaves worse, use Roll Back Driver or the restore point. Our roll back guide covers both, including what to do when the button is greyed out.
macOS note
On a Mac, drivers for built-in hardware are part of macOS. You update them through System Settings > General > Software Update, along with security fixes. There is no Device Manager and no System Restore; back up with Time Machine before a major update instead. Only add-on devices such as printers, scanners or audio interfaces may need the maker’s own software, and it should list your macOS version and processor type, Apple silicon or Intel. Do not lower startup security or turn off System Integrity Protection to install anything.
On a work or school computer
Organisations often manage drivers centrally and may block manual installs by design. Ask your IT team before you change anything, and tell them what you noticed.
Keep going
The other guides in this section go deeper on single steps: why third-party updater tools carry risk, what driver versions and dates actually mean, and when not to update a driver.

Step 4, in practice
What a backup covers that a restore point does not
A restore point records system files, installed drivers and some settings so Windows can return to an earlier state. It does not protect your documents, photos or other personal files, and restore points can be removed when disk space runs low. A file backup is the other half of a safe update.
For most people, a copy of important folders to an external drive or a cloud service is enough before a driver update. Check that the backup actually contains the files you expect by opening one or two from the backup location.
- Restore point: undo driver and system changes.
- File backup: recover personal files if something else goes wrong.
- Disconnect the external backup drive after copying, so it is not affected by any later problem.
Worked example
Example: the method applied to one printer driver
Scenario: a home printer occasionally prints garbled pages, and the maker lists a newer driver.
- Need: the symptom is real and repeated, and the release notes mention print output fixes. A change is justified.
- Identify: note the exact printer model and the current driver version in Printers and scanners.
- Obtain: download the package for that model and Windows 11 from the printer maker's support page, and skip optional extras.
- Prepare: create a restore point and confirm your file backup.
- Install and verify: install, restart if asked, then print the same document that garbled before.
If the garbling continues, the driver probably was not the cause. Check the cable or network connection and the print queue before trying anything else, and keep the previous version recorded so you can return to it.
Before you click install
Power and connection during the install
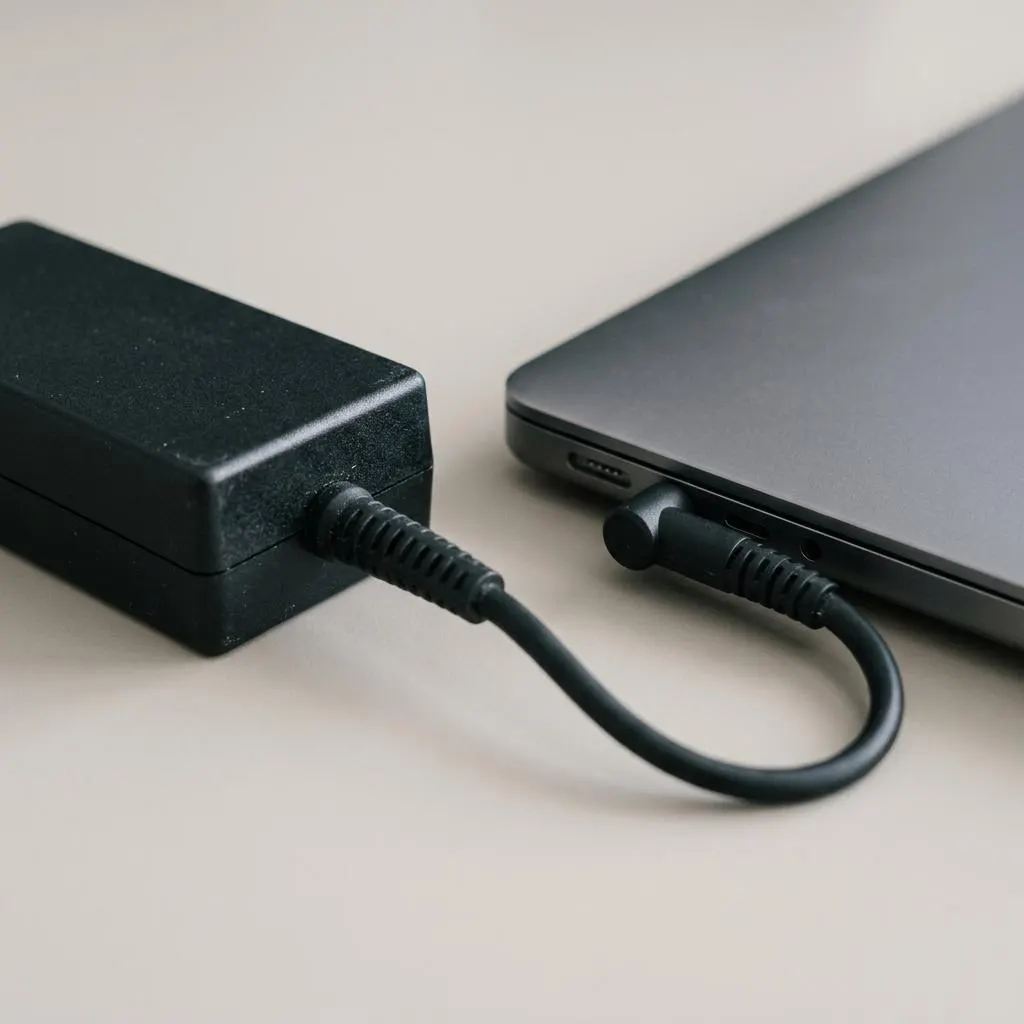
Driver installs are usually short, but the moments when files are being replaced and the system restarts are the moments not to lose power. On a laptop, connect the charger. On a desktop, avoid updating during storms or known power interruptions.
Keep the connection in mind too. If you are updating a network driver, download the package first, so you are not relying on the adapter being replaced. Keep the previous package or note its version, in case you need to reinstall it.
Firmware and BIOS updates are a separate category with stricter rules from the computer maker. This guide does not cover them, and you should follow the maker's instructions exactly if you ever need one.
Step by step
Follow along
Step 1: Check whether a change is needed
Write down what is wrong and when it started, look for a warning mark on the device in Device Manager, and install pending updates in Settings > Windows Update first. If the device works and no advisory or Windows requirement applies, stop here.
Start with a specific reason, not just a newer version number. Step 2: Identify exactly what you have
Note the computer model, the device's hardware ID plus its current Driver Version and Driver Date, and your Windows 11 edition and system type. An Arm-based PC needs Arm64 drivers.
Step 3: Get it from the manufacturer
Type the computer maker's web address yourself, enter your model or serial number, choose Windows 11 and the right architecture, and read the release notes. Save the package and note its version and date.
Laptops and prebuilt PCs: start with the computer maker's page for your exact model. Step 4: Create a restore point and back up
Open Create a restore point, make sure System Protection is on for the system drive, select Create and wait for the success message. Back up personal files separately; a restore point does not protect them.
Step 5: Install and verify
Install the one package, decline extra software, and restart when asked. Confirm the version on the device's Driver tab, then test what was broken. If it behaves worse, use Roll Back Driver or the restore point.
Verify the installed version, then test properly for a while.
FAQ
Questions people actually ask
Do I need to follow all five steps for every driver Windows Update installs?
No. Windows Update picks drivers targeted at your hardware and installs them for you, and Windows creates restore points around many updates when System Protection is on. The five steps matter most when you choose to install a driver yourself, such as an optional driver update or a package from your computer maker.
What if System Protection is off on my PC?
It can be off, especially on new or reset PCs. Search Start for Create a restore point, open the System Protection tab, select your system drive, choose Configure, then Turn on system protection. After that, select Create and wait for the confirmation message before you install anything.
Is the newest driver always the right one to install?
Not necessarily. Choose the driver your computer maker lists for your exact model and Windows version, with release notes that fix something you need or a security issue that applies to you. Installing the newest file just because it exists adds change without a reason.
How is this different on a Mac?
Drivers for a Mac's built-in hardware ship inside macOS, so you update them through Software Update. There is no restore point; back up with Time Machine before major updates. Only add-on devices such as printers or audio interfaces may need software from their maker.